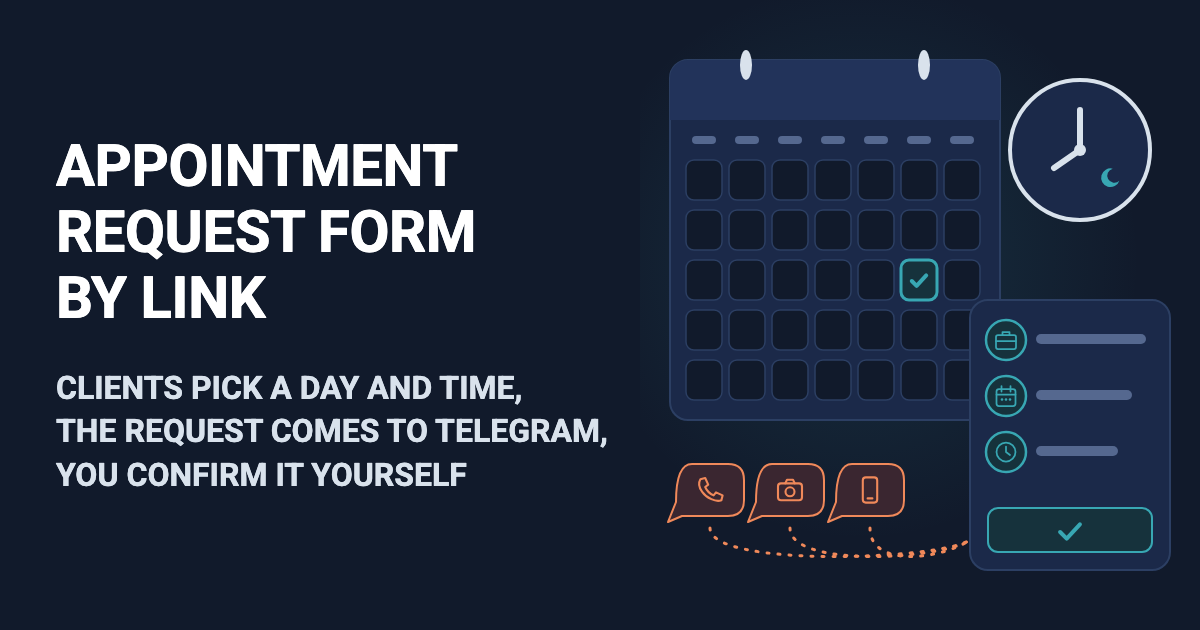
"Is Saturday evening free?" comes in on Instagram, a client calls while your hands are busy, and someone on WhatsApp asks about "next week" without saying what they need. An appointment request form puts all of that behind one link. The person picks a service, a day on a calendar and a time of day, then leaves a name and a phone number. You get the whole request in Telegram as one message and call or write back to agree the time.
What you gain is one place for every request, each with the service, the day, the time of day and a phone number, instead of pieces spread across WhatsApp, calls and Instagram. The form does not book anyone, though. People do not see your free hours, two of them can ask for the same evening, and nobody gets a reminder. You confirm each request yourself. Open slots that clients pick on their own, separate hours for each person who takes bookings, deposits and reminders are not part of the form today; they can be built as an add-on or as custom work on top of it: describe what you need on the support page.
If all your clients already write to you in Telegram, the guide to a Telegram booking bot for salons sets up the same idea inside a chat. This one gives you a web link that opens in any browser, so your clients need no Telegram. Only you do.
Check that requests are enough for you
A request form fits when you work alone or with one helper and every booking ends with a short call anyway. It also fits when you need to know the job before you name a time: a first lesson, a photo shoot, a repair. If most of your week is regular clients, such as students who come every Tuesday, keep their reschedules in your chat with each family and in your calendar: the form takes new requests and one-off bookings and has no list of standing lessons to move. For a group class with a fixed number of places, where each person should get a yes or a no from the bot, the event registration form fits better.
Online booking with live slots, the kind Calendly or Google Calendar offer, is worth it when:
- several people take bookings, each with their own hours;
- new clients book short fixed slots every day, so two requests for one slot would mean extra calls all the time;
- you take a deposit when people book, or want clients reminded automatically (in both tools these are paid features);
- clients book late at night and expect an instant yes.
Easy Post does none of these four things. The Google Forms comparison covers how the form differs from a Google Form.
Where to start
You set everything up on the easy-post.app website; its Telegram forms page shows how it works. Sign in with Google and, on the first screen, "What do you want to receive?", press "Bookings and service requests". Easy Post builds the form from the Service Request template at once and opens the pipeline page. A pipeline is your form together with the requests it collects (Easy Post calls each request a submission). Among the buttons at the top of this page you need three: Submissions (the list of everything people sent), Form (the questions and texts) and Edit (the pipeline's name). Below them is a yellow "Still to do" panel, and under it a block called "Where people send submissions".
In the yellow panel, press "Test the form in Telegram". Telegram opens with the Easy Post bot; press Start. The bot replies that your Telegram is linked, then sends a greeting with its own Start button. Press that one, and the first question arrives. Answer every question as if you were a client; the template's questions, such as "Service 1", are fine for now, and when the bot asks for a photo, press its "No photo" button. A message with your answers arrives in the same chat, and the pipeline page updates itself to say "The form works". If Telegram is not on your computer, sign in on your phone and open the pipeline page there for this step.
Right after your test the bot sends two more messages: one with a "Send the form" button, and one asking whether to publish requests in a channel, with a "Choose a channel" button. Skip both, and skip "Add a channel if you want to publish" in the yellow panel too: a channel would post requests for others to read, and the link you will share is the web page. If you already use Easy Post, press the "+ New pipeline" button on your project page (the page that lists all your pipelines) and pick Service Request in the Business group, if your plan has room for another pipeline.
Try the service request template →
Turn the template into an appointment request form
Start with the pipeline name, which heads every Telegram message you get, after "New submission in". Press Edit at the top of the pipeline page, change "Pipeline Name" to something like "Lesson requests" and press "Update Pipeline". The site then opens your project page, which lists your pipelines; Easy Post made it for you when you picked the template. Click "Lesson requests" in that list to get back to the pipeline page.
Now press Form. This opens the form settings. At the top, change "Form Name" to what clients should read, for example "Book a lesson". The hint under it says "Internal name", but this name is also the heading of the web page clients see. Below are the questions, each in its own box. In a box, "Field name, shown only to you" is the label in your Telegram message, "Bot prompt" is the question people read (on the web page too), the × in the corner deletes it, and the small ↑ and ↓ arrows at the left edge move it.
Go through the questions from the top:
- Service: in the box under the prompt, replace "Service 1, Service 2, Service 3, Other" with your own services, for example "Trial lesson, Maths, Physics, Other". Commas separate the buttons, so keep them out of the names. Bot prompt: "What would you like to book?"
- Details: change the bot prompt to what you need to know before the call, such as "What should I know? Class, topic, goal:" or "What needs fixing?". The answer has to be at least 5 characters long.
- Address: if you visit clients or also teach online, change the field name to "Place" and the bot prompt to "Where? Write Online or your address:". If clients always come to you, delete it with the ×.
- Preferred Time: replace its buttons with time ranges, "Morning (9-12), Afternoon (12-4), Evening (4-8), Any time", and change the bot prompt to "What time suits you?". People can pick only one button, so "Any time" catches those who are flexible.
- Photos: delete it with the ×. Photos never reach your Telegram; you would see them only under Submissions.
- Name and Phone: keep both, because a request from the web page carries no name or account. A good phone prompt is "Phone or WhatsApp number to confirm:". The Phone type refuses email addresses; for email, change the Type to Text.
Then add the day. Press "+ Add Field" under the last question. In the new box, write "Preferred Date" in "Field name, shown only to you", choose Date in the Type menu, tick Required and write the bot prompt "Which day suits you? Lessons run Monday to Saturday." The new question appears at the very end, so press its ↑ arrow until it sits right above Preferred Time.
Also, only if it applies. If you deleted Address, a yellow note "No field matches {address}" appears under the Post Template box below the questions: it does not stop the form from saving, and the box only shapes posts for a channel, so your messages are not affected. To clear the note, delete the line that ends with {address} in that box. If you keep Photos for repair jobs, delete "(up to {max_files})" from its prompt, because the web page shows that code as it is.
Now press Save, either the one under the questions or the one under "Submission Settings", below "Bot Messages" further down: both save the questions and the texts. A green "Form settings saved." line appears at the top. If it does not and your new question is gone, its "Field name, shown only to you" box was empty; fill it in and save again. The last Save on the page, in the "Web form" box at the very bottom, saves only a list of sites, so do not use it for these edits.
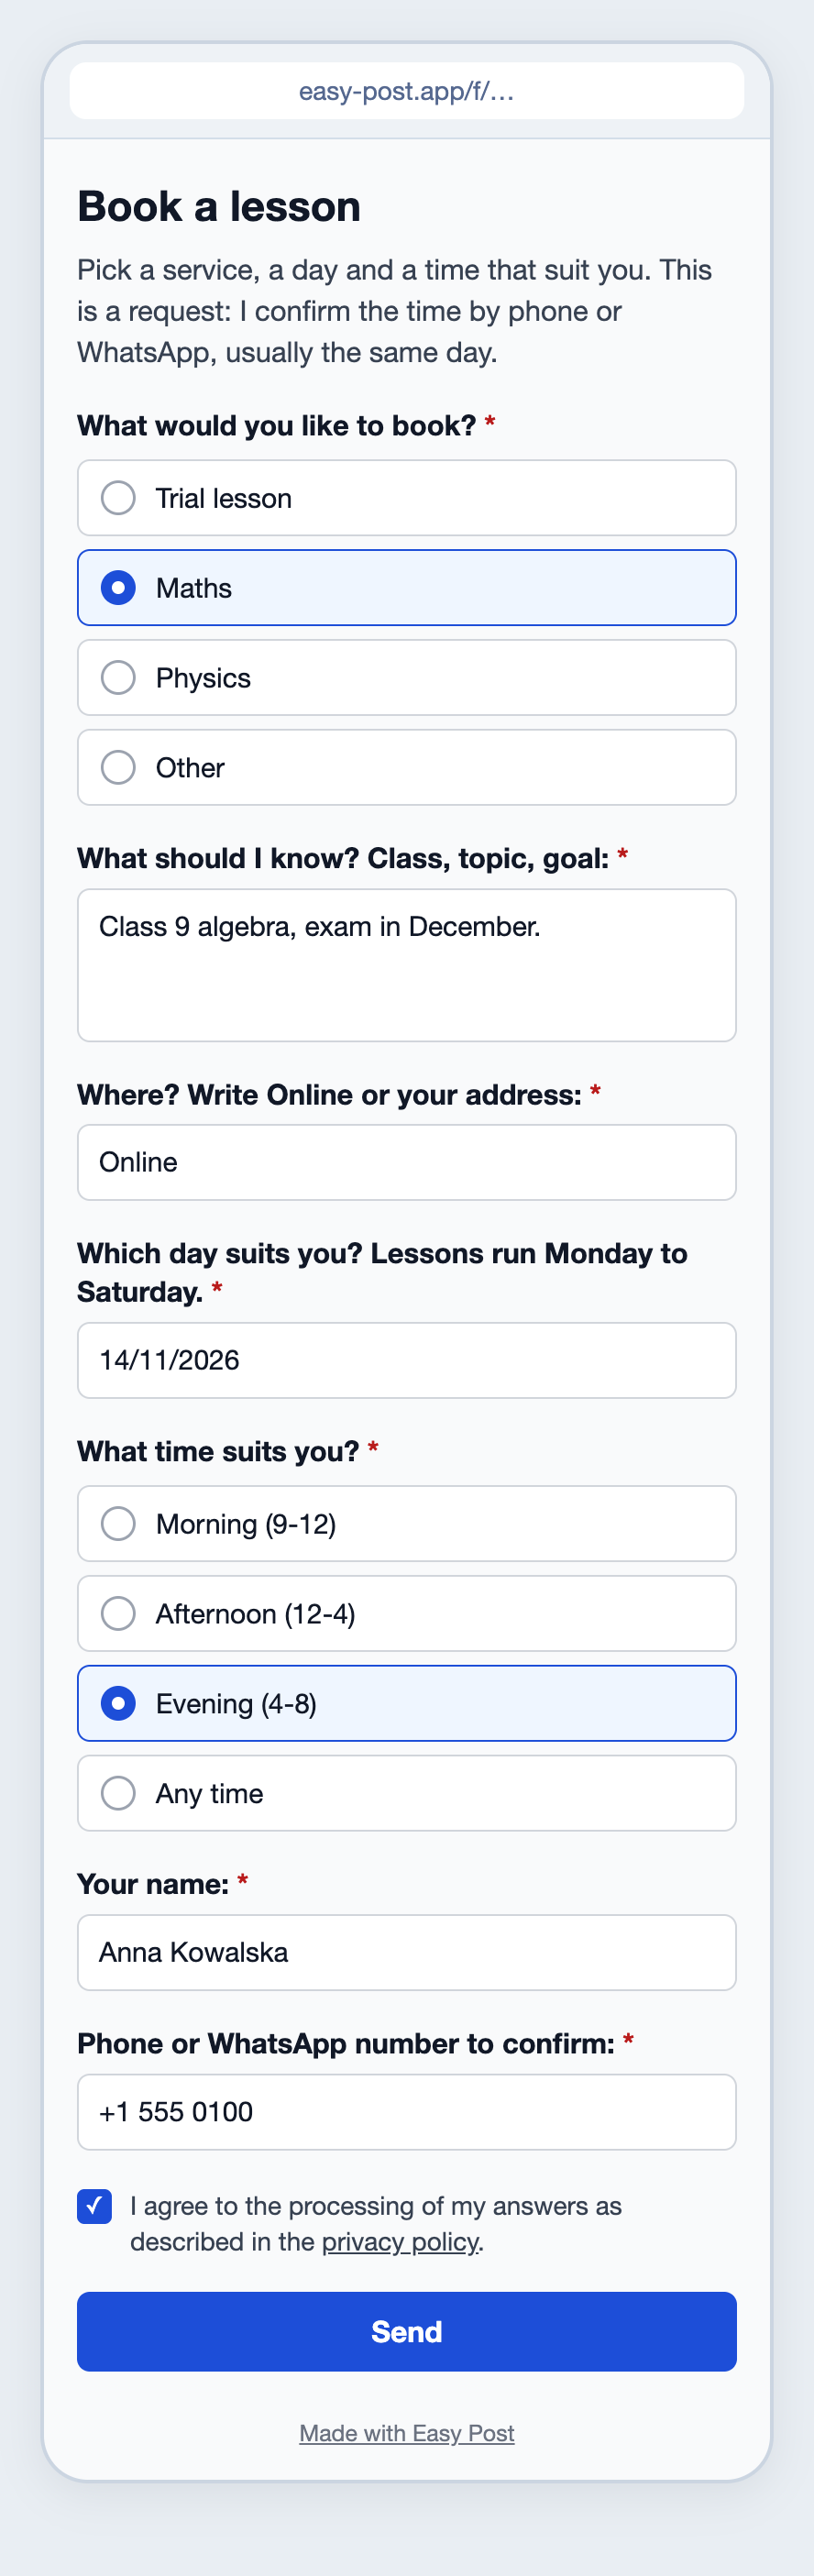
Illustration: the questions and texts are the ones you write; the rest is the page's own. Names and data are made up.
On the web page the Date question opens the phone's or browser's calendar; in the bot, people type the date. Neither knows your schedule, so a client can pick a Sunday or a past date: naming your working days in the prompt makes that less likely. The consent tick with a link to Easy Post's privacy policy is added by the page itself.
Tell people it is a request, before and after
Scroll down the form settings to "Bot Messages". Its two texts appear on the web page and in the bot, and they tell people that the time is not booked yet.
The "Welcome Text" appears on the web page under the heading. The box starts with "Welcome! Press the button to submit your entry.", which is about the bot's Start button, and the web page has none. Replace it:
Pick a service, a day and a time that suit you. This is a request: I confirm the time by phone or WhatsApp, usually the same day.
The "Completion Text" appears after the person presses Send. The box starts with "Thank you! Your submission is awaiting review.", which suggests that someone will approve it with a button, and in this setup nobody does. Replace it:
Thank you, I have your request. The time is booked only when I confirm it. I will call or message you today to agree it. If you see a "Find out the result in Telegram" button, you can skip it.
On the web page that button sits under your text, next to the page's own line "Want to know when it is reviewed? Open the bot and press Start: it will message you the result." You cannot remove either. Nothing in this setup approves requests, so no result is ever sent: a client who presses the button only gets a bot message promising one. Promise only what you can keep (if you teach all day, write "this evening" instead of "today"), then press the Save under "Submission Settings", a little further down the page.
Share one link
Go back to the pipeline page: click the pipeline name in the small line above the "Form Settings" heading. In "Where people send submissions", the "Web form" card should say "On · taking submissions": a pipeline made from the first screen starts with the form on. If it says "Switched off" (a pipeline made with "+ New pipeline"), press its switch; it saves at once. The card then shows "Link to the form" with "Copy link" and "Open the form", and two folded sections, "QR code" and "Code for your site".
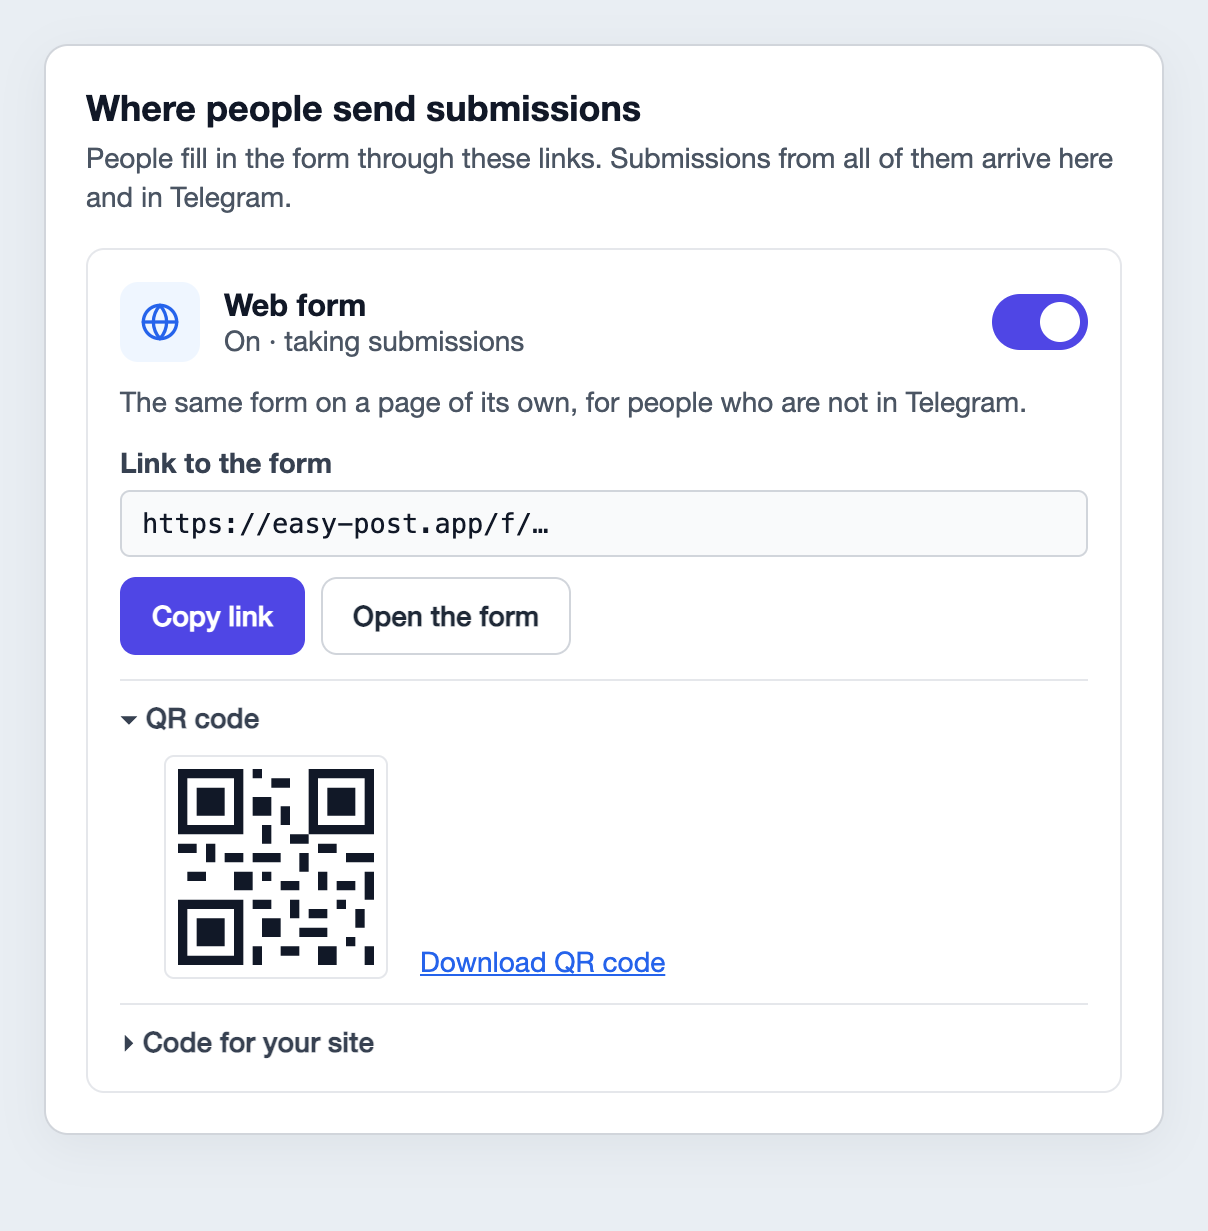
Illustration: the texts are the site's own; the Telegram bot card next to it and the plan note are left out.
Before you share the link, press "Open the form" and send one test request. Check that the message reaches Telegram with the line "Sent through the web form". A web test sent before the bot test from "Where to start" never reaches you, because your Telegram is not linked yet. The web test also closes the yellow "Still to do" panel, which is expected: the link and the QR code stay in "Where people send submissions".
Then press "Copy link" on the "Web form" card. The other "Copy link" buttons on this page, on the "Telegram bot" card and in the yellow panel, give a link to the bot instead. Paste the web form link into WhatsApp whenever someone asks for a lesson, and put it in your Instagram bio, your WhatsApp Business profile and your Google Business Profile. For a business card or a sign, open "QR code" and press "Download QR code" to get an SVG image; if your printer cannot open it, print a screenshot of the code. To show the form inside your website, open "Code for your site" and press "Copy code". A client who prefers Telegram can use the bot link: a request through the bot shows their Telegram name, and their @username if they have one.
Confirm each request
Each request reaches your Telegram as a message from the Easy Post bot. It starts with "New submission in" and the pipeline name, then "Saved in your dashboard" (the dashboard is your Submissions list), then the answers and the line "🌐 Sent through the web form". The "Review submissions" link at the bottom opens Submissions. There are no buttons: the next step is your call.
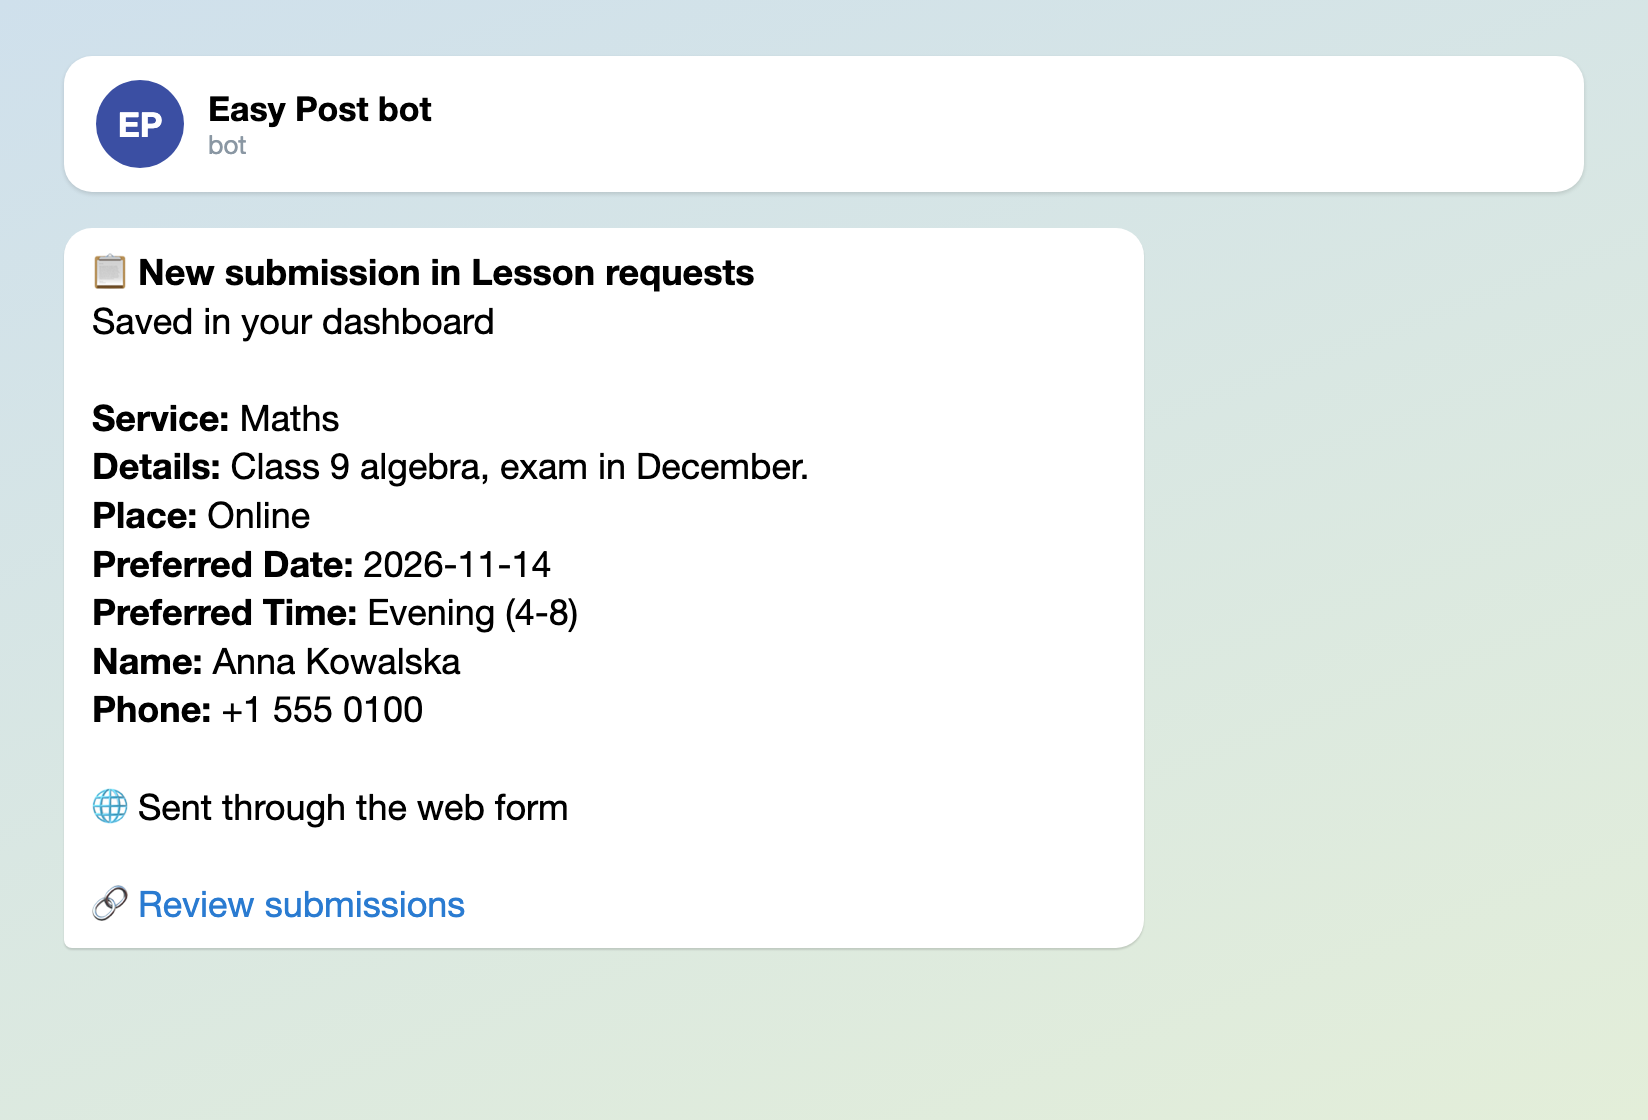
Illustration: the texts are the bot's own, and the field names are the ones you set; names and data are made up.
A date from the web page always arrives as year, month and day, like 2026-11-14, whatever the client's phone showed. Check the weekday before you call. A date typed in the bot arrives as typed. Each answer is cut after 300 characters; the full text is under Submissions.
Call or message the number, agree the time and write it into the calendar you already keep. If you keep none, use your phone's calendar app or one note per day in Telegram's Saved Messages, and check it before you agree any time. Easy Post has no calendar and no "confirmed" mark. To keep track of who you have called, open Submissions and press the small grey Delete button on the row of each request you have settled. It asks "Silently delete this submission? The submitter will not be notified." and moves the request to the Deleted tab, where it stays readable. The list then shows only the people still waiting for your call. Never use the "Bulk action..." menu at the top of the list for this: its Delete, applied with the Apply button, erases requests for good. Do not use Approve or Reject there as a mark: clients who used the bot get a message about it.
If two people asked for the same evening, offer the second one another time on that call. Nothing reminds the client either, so if missed appointments cost you, send a short message the day before.
To share the requests with a colleague, open your project page (the project name in the small line at the top of the pipeline page), press Members and invite them by the email of their Easy Post account. Once they press "Link Telegram Account" on the pipeline page or in their Profile, both of you get every request, so agree who calls back. Members can also edit the form and delete requests.
Set it up in seven steps
- Sign in, pick "Bookings and service requests" on the first screen, press "Test the form in Telegram", press Start, then the greeting's Start, and answer as a client. Skip the channel questions.
- Press Edit, rename the pipeline, press "Update Pipeline" and click the new name on your project page.
- Press Form: rename the form, type your services and time ranges, rename or delete Address, and delete Photos.
- Add the Date question with "+ Add Field" and move it above Preferred Time. Paste the two texts under "Bot Messages" and press Save under "Submission Settings".
- Back on the pipeline page, check that the "Web form" card says "On · taking submissions" (if not, press its switch), press "Open the form" and send a test request. Check the message in Telegram, then remove your tests in Submissions with the grey Delete button on each test's own row, not the "Bulk action..." menu.
- Press "Copy link" on the "Web form" card, put the link in your profiles and WhatsApp chats, and download the QR code for print.
- When a request comes in, call, agree the time, write it into your calendar and press the grey Delete on that request's row in Submissions.
Other forms for similar jobs: service request form, booking bot for salons and lead form. All forms are listed by job in the guide to forms in Telegram.
New to Telegram bots? How to create a Telegram bot without code explains the basics; this setup needs no bot of your own.