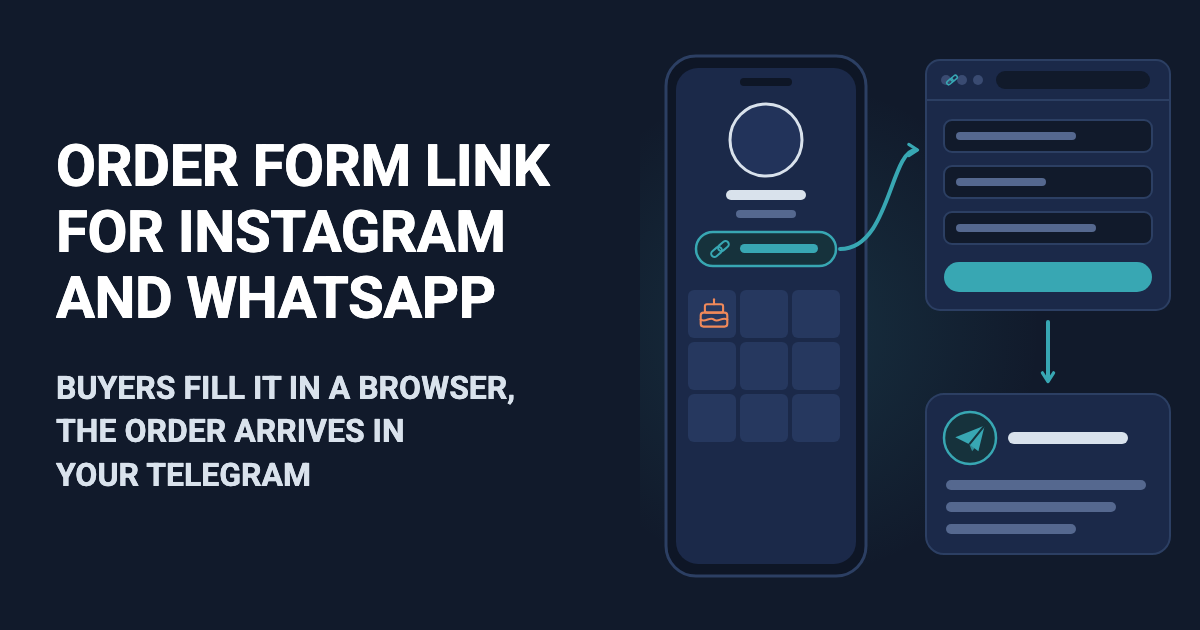
A customer sees a cake in your Stories and messages you "I want this one". Then the back-and-forth starts: what weight, for which date, where to deliver, how they will pay, which number the courier should call. While you answer one message, three more arrive, and you copy the WhatsApp order into your notes so you do not lose it. A WhatsApp order form hands those questions to the customer. They open the link from your profile and answer a few short questions on an ordinary web page, with no sign-up and no Telegram. You get the order as one message in your Telegram.
The form only collects answers to your questions. It has no catalog with prices, no cart and no payment, and you cannot reply to the customer from the message: you call or text them yourself, using the number in the order. A catalog with prices, a cart and payment are not part of the form today; they can be built as an add-on or as custom work on top of it: describe what you need on the support page.
Where to start
- Sign in to easy-post.app with Google. On the first screen, "What do you want to receive?", press "Orders": the form is built from the "Order with Delivery" template at once, and the pipeline page opens. A pipeline is your form together with its list of orders, and you do everything below from this page.
- The pipeline page has a yellow "Still to do" panel. Press "Test the form in Telegram" in it. Telegram opens with the Easy Post bot: press Start at the bottom of the chat. The bot replies that your Telegram is linked and that new submissions to your pipeline will arrive in this chat. Then it sends the form's welcome message with a "Start" button (on some plans with a "Powered by Easy Post" line); press it, and the first question arrives. Answer as a customer would; the questions are still the template's. The last question is optional, and the "No comment" button skips it. The order message arrives in the same chat, which means everything works. From here on, this guide calls that message a card. The pipeline page refreshes by itself and says "The form works: your test submission came through." Later, delete the test order under "Submissions" with the "Delete" button. If you do not have Telegram on your computer, open the pipeline page on your phone.
- At the top of the pipeline page is a row of buttons. "Form" opens the questions and texts, "Submissions" lists all orders, and "Edit" changes the pipeline's name.
You do not need a channel (a Telegram feed for subscribers) here, so leave the channel field in the panel empty. You do not need a bot of your own either: you use the shared Easy Post bot.
If you already have an account, press "+ New pipeline" on the project page, which lists your pipelines, and pick the "Order with Delivery" template from the list.
Name your products in the form
You start from the Order with Delivery template in Easy Post. It has seven questions, six of them required, and the first one has the buttons "Item 1", "Item 2", "Item 3" and "Other". Those buttons mean nothing to a customer, so start there. Press "Form" at the top of the pipeline page. Each question there sits in its own frame. The frame holds a "Field name, shown only to you" box (the answer's label on the card), a "Bot prompt" box (the question itself, which people see both in the bot and on the form page), a "Type" menu, a "Required" checkbox and, when the type is "Buttons", a box with the button names separated by commas. Go through the questions from top to bottom:
- "What would you like to order?" Type your products separated by commas, for example "Honey cake 1 kg, Napoleon 1 kg, Red velvet 1500 g, Other". A comma separates buttons, so "1,500 g" turns into two buttons: write "1500 g". Keep each button name under about 55 characters. Length does not matter on the page, but the same form also runs in the bot for customers who come from Telegram, and there a name that is too long breaks the question. The "Field name…" box says "Item". That is the label you will read on every card, and it already fits an order, so you can leave it.
- "How many?" The buttons "1, 2, 3, 4, 5+" suit products sold by the piece. For weight or portions, type your own options.
- "Delivery address:" If you also offer pickup, untick "Required" on this question and rewrite it as "Delivery address (leave empty if you'll pick it up):". While the box is ticked, a customer cannot send the form without an address.
- "When should we deliver?" The options "As soon as possible, Today, Tomorrow" work for food ordered for today. People order a cake for a set date, so in the "Type" menu change "Buttons" to "Date", and change the question to "What date do you need the cake for?". On the form page the customer picks the date in a calendar, and the card shows it as 2026-11-14. In the bot they type the date as text, and the bot does not check it. In the "Field name…" box, replace "Delivery Time" with "Date".
- "How will you pay?" Keep the methods you accept and add your own, for example "UPI". The form itself does not take money.
- "Phone number for the courier:" Keep it required. A card for an order from the website shows neither the customer's name nor their account, and this number is your only way to reach them. You can rewrite the question as "Phone or WhatsApp:".
- "Anything else? Entrance, floor, intercom, or the item if you chose Other:" This question is optional. Add what matters to you, for example "message on the cake".
Above the questions is the "Form Name" box. The hint under it calls it an internal name, but on the page your customer opens, it is the heading. The template puts "Order with Delivery" there; type your shop's name instead, for example "Marina's Cakes: order". Press "Save" under the list of questions. This page has two "Save" buttons, one under the questions and one under "Submission Settings", and either of them saves everything at once: the questions and the texts. Further down, the "Web form" box has a third "Save" that saves only its list of sites, not the questions or texts. If you leave the page without pressing one, you lose your changes.
The card in Telegram starts with "New submission in" and the pipeline's name, and your pipeline is also called "Order with Delivery". Change it separately: press the "Edit" button at the top of the pipeline page, type a name such as "Marina's Cakes" in the "Pipeline Name" field, and press "Update Pipeline". The site then opens your project page, not the pipeline: to get back to the questions, press the pipeline's name and then "Form".
If you need another question, for example "How can we reach you?" for people who prefer email or an Instagram handle, press "+ Add Field" under the list of questions. The new question appears at the bottom and is optional. Fill in both of its boxes, "Field name…" and "Bot prompt": the form will not save with an empty name. The article Google Forms vs Easy Post compares this kind of form with Google Forms.
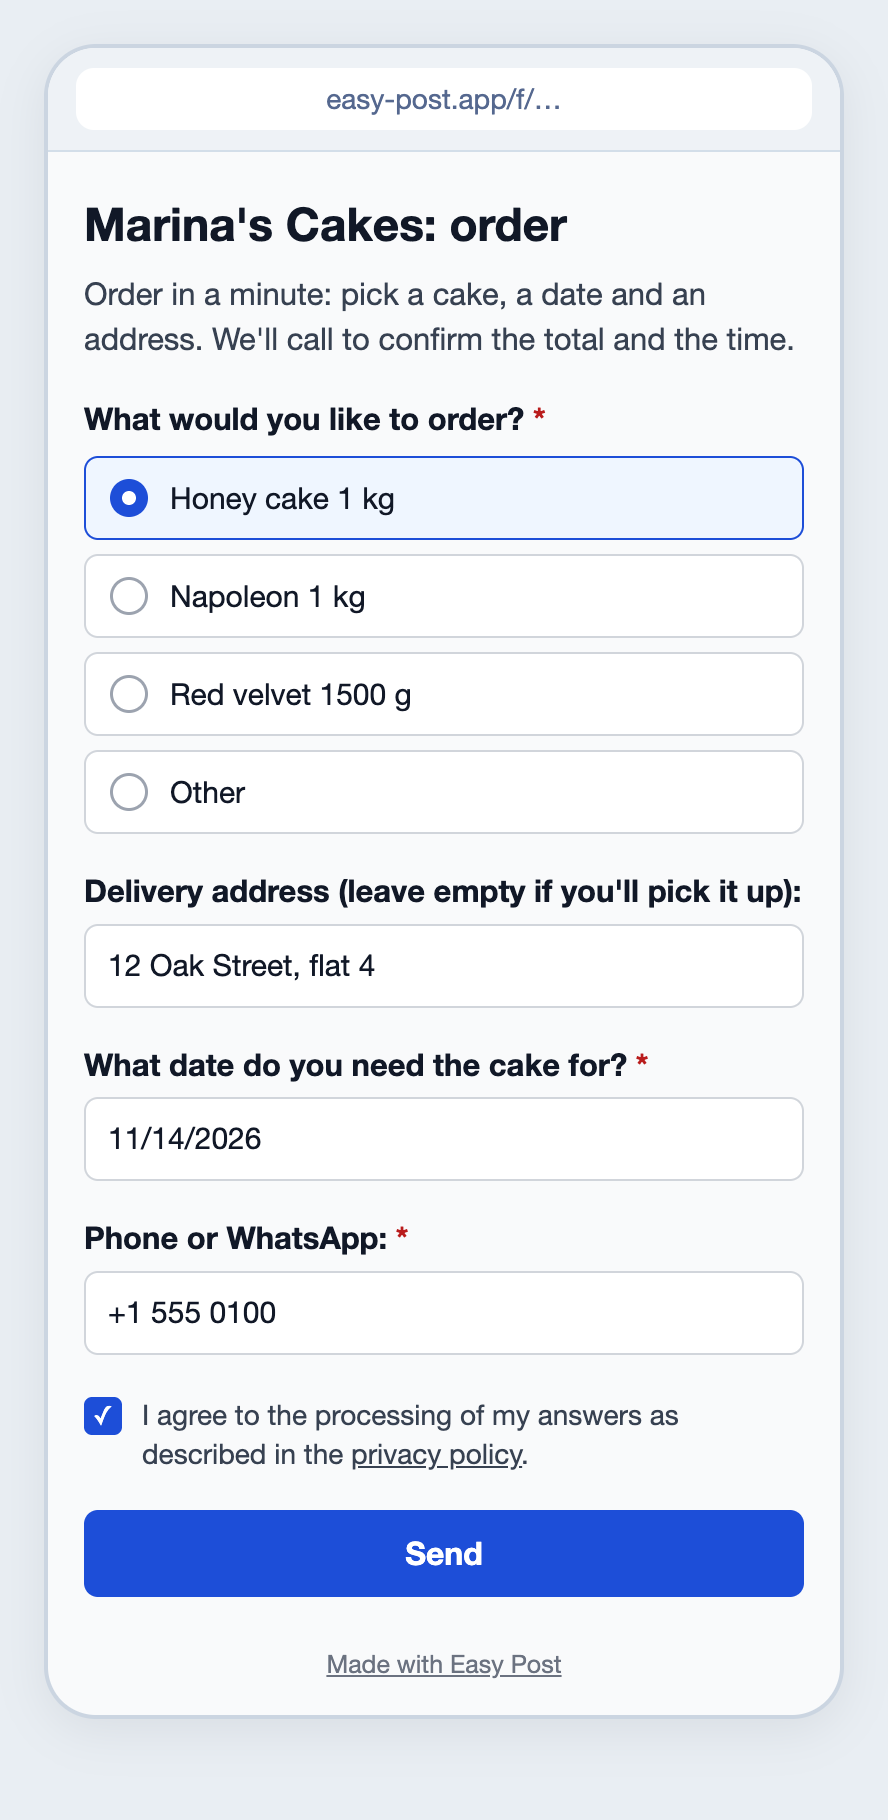
Illustration: the texts are the product's own, and the form owner writes the questions and buttons; some questions are not shown; names and data are made up.
Write what the customer reads before and after sending
Below the questions, in the "Bot Messages" section, there are two texts. Customers see these texts in the bot and on the form page. The customer sees the "Welcome Text" under the page heading. The box already holds the default "Welcome! Press the button to submit your entry." That line is meant for the bot, which has a "Start" button, and the page has no such button. Delete it and write your own: when you save, your text stays. For example:
Order in a minute: pick a cake, a date and an address. We'll call to confirm the total and the time.
The customer sees the "Completion Text" on the "Sent" page after pressing "Send". The default "Thank you! Your submission is awaiting review." is wrong here: you are not reviewing anything, you are calling back. Write when and how you will get in touch, with your own working hours:
Thank you, your order is in! We'll call the number you gave within an hour, between 9 am and 8 pm. If we can't reach you, we'll message you on WhatsApp.
Press the "Save" under "Submission Settings", below these texts.
Under your text, the "Sent" page adds the line "Want to know when it is reviewed? Open the bot and press Start: it will message you the result." and a "Find out the result in Telegram" button. You cannot remove them. Your form has no step where you approve an order with a button, so the bot only sends the customer "Done. You will get a message here when your submission is reviewed." and nothing after that. Your "Completion Text" tells them in advance where your answer will come from: a call or WhatsApp.
Share the WhatsApp order form link in your profiles and on packaging
Under the "Still to do" panel on the pipeline page is the "Where people send submissions" block. It has two parts: "Telegram bot" and "Web form". "Web form" should say "On · taking submissions": a pipeline made from the first screen starts with the form on. If it says "Switched off" (a pipeline made with "+ New pipeline"), press its switch; it saves right away. With the form on, you see "Link to the form", the "Copy link" and "Open the form" buttons, and below them the collapsed "QR code" and "Code for your site" sections.
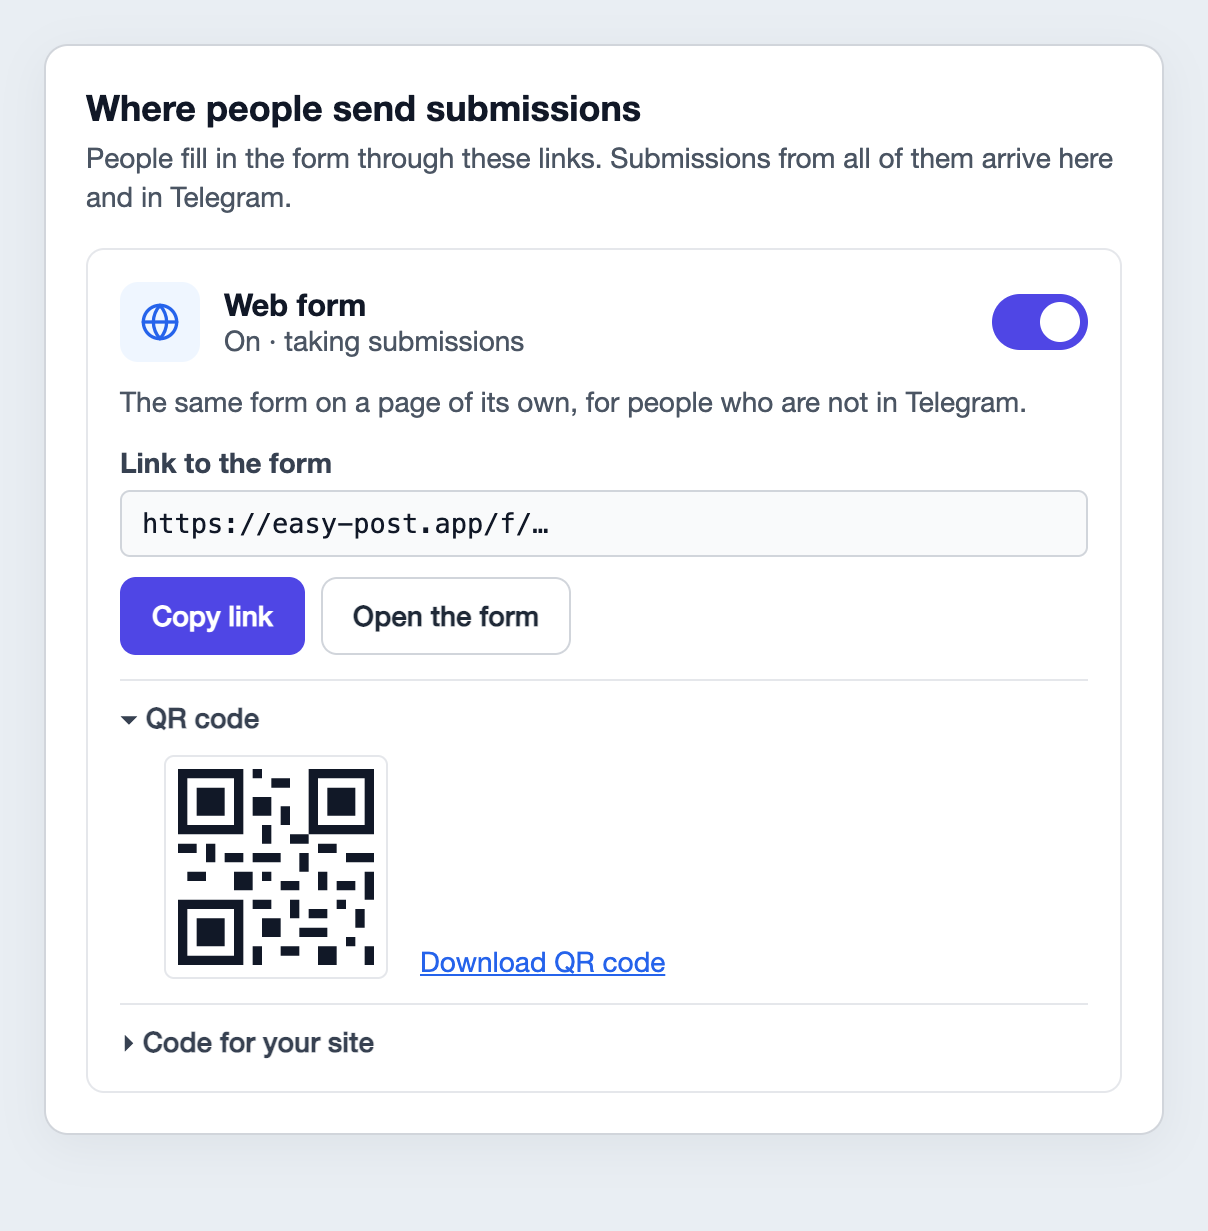
Illustration: the texts are the product's own; the link and QR code are placeholders.
- Instagram: add the link to your bio and to a Link sticker in your Stories. You can save a story with the link to Highlights. If you already use a link-in-bio page such as Linktree or Taplink, add the form there as a separate "Order" button.
- WhatsApp Business: put the link in the website field of your business profile and in a quick reply, so you can answer "how much?" with the link.
- Packaging, business cards, flyers: open "QR code", press "Download QR code" and send the file off for printing. A customer can scan the code on the box to order again.
- Website: "Code for your site" embeds the same form on your page. No website? Skip this.
Customers who use Telegram can also order through the shared Easy Post bot: "Copy link" in the "Telegram bot" part gives you its link, and the questions there are the same. The guide to forms in a Telegram bot covers bot forms in detail.
Send your test order with "Open the form" once Telegram is linked: otherwise the test card has nowhere to go. After this test, the "Still to do" panel closes. It closes by itself when Telegram is linked and the first order from a customer arrives, and an order from the website counts as a customer's order even if you sent it yourself. This is not a bug, and you lose nothing: Telegram stays linked, and the link and QR code stay in the "Where people send submissions" block.
Take the order and call back
The order reaches your Telegram as a card. At the top is "New submission in" followed by the pipeline's name, then the line "Saved in your dashboard": that is how the product tells you the order is in your "Submissions" list. Then come the answers with your labels. Where a customer's name would be, the card says "🌐 Sent through the web form": an order from the website has no account to show. The card has no buttons. You call the number in the order, confirm the total and the time, and take payment your own way.
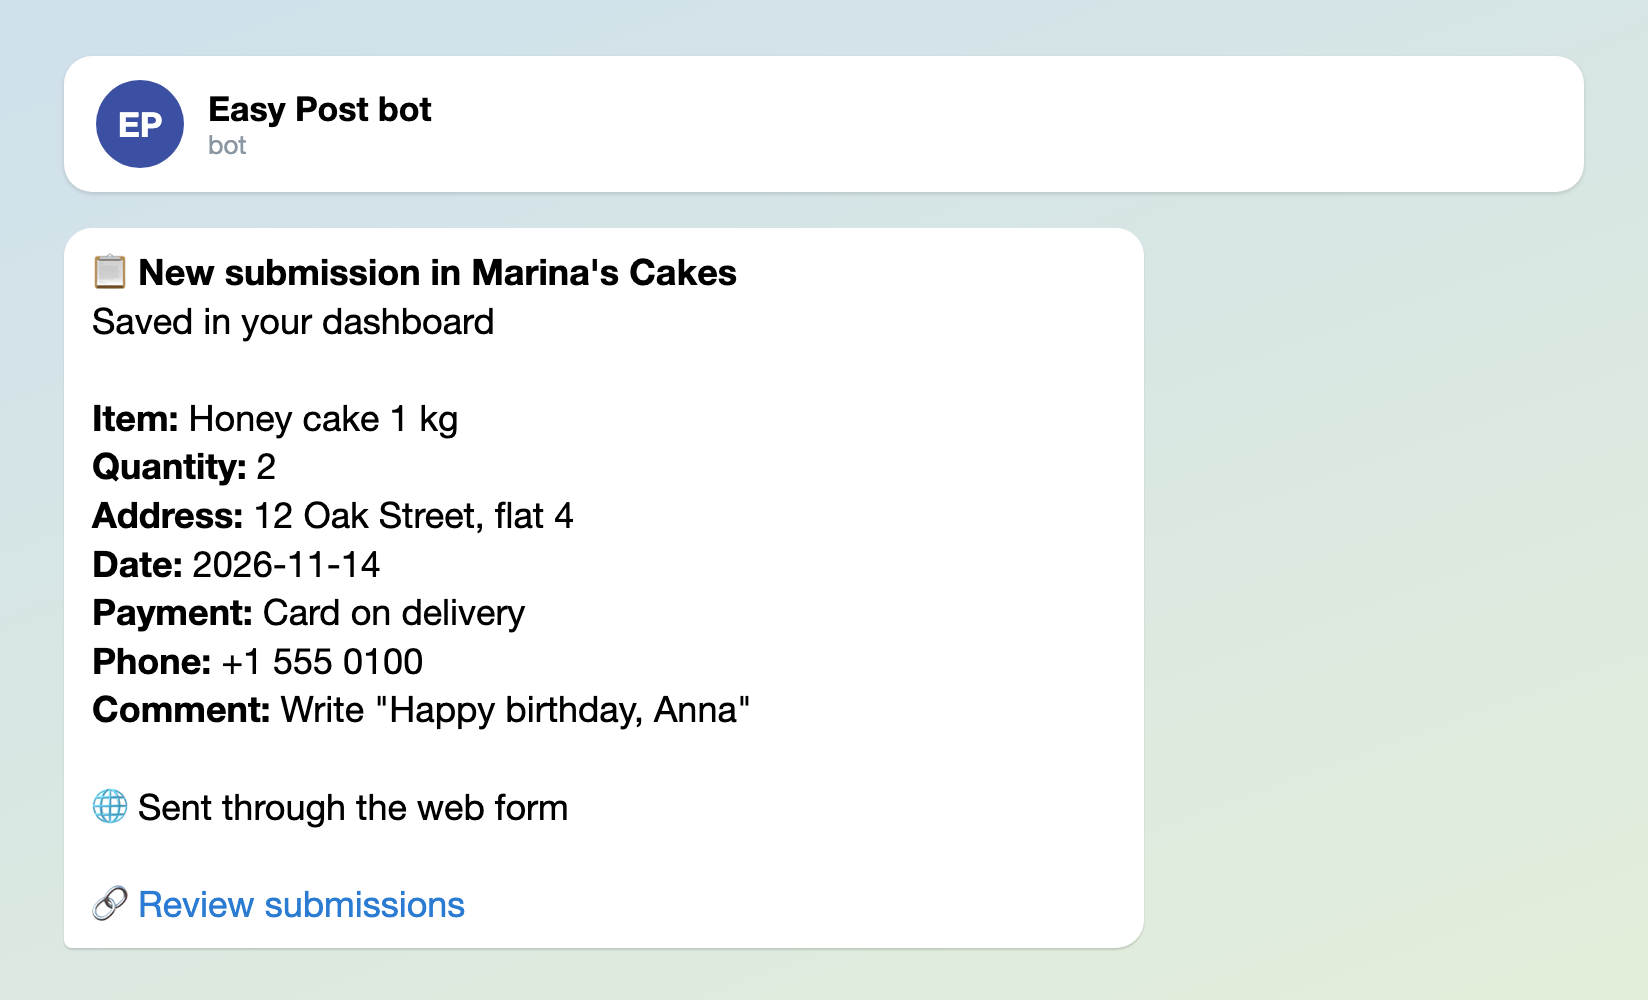
Illustration: the texts come from the bot, and the form owner writes the field labels; names and data are made up.
All orders are in "Submissions", and the "Review submissions" link on the card takes you there. In that list the answers carry the fields' internal names (item, address, phone); your labels appear only on the card. Easy Post cannot mark orders as baked, paid or delivered, and it has no export to a spreadsheet. To keep track, forward each card to Saved Messages in Telegram or to a group you made just for orders, and delete the finished ones from there. If you also take orders for services, see the quote request form guide.
Where it breaks
- Cards do not arrive. That means Telegram is not linked, and without the link the "Still to do" panel does not close: press "Test the form in Telegram" in it. Your orders are still in "Submissions".
- A customer typed an email into the phone field. The "Phone" type accepts only digits, spaces and the characters + - ( ), with at least seven digits. For email or an Instagram handle, add a separate question as described above.
- Two different products in one order. A customer can pick only one button. Ask customers to add the second product in the "Anything else?" question, or add an option such as "Combo".
- Spam. The form page filters out bots by itself. The "Submission Limits" in the form settings (how many orders one person can send in a day) apply only in the bot; the page has none.
- The link in an old story stopped working. A switched-off web form or pipeline answers with a "not found" page. Before a holiday, change the "Welcome Text" instead of switching the form off.
- "Made with Easy Post" appears at the bottom of the page. This line is there on some plans; the "Web form" part on the pipeline page says which plan removes it.
- The page is in another language. System words ("Send", the consent line) follow the customer's browser language if it is English, Russian, Ukrainian or Hindi. If the browser uses another language, for example Tamil, they appear in your bot's language, which is usually the language of your Easy Post account. Your questions and buttons stay as you wrote them.
Setup in five steps
- Sign in with Google, pick "Orders" on the first screen, press "Test the form in Telegram" in the "Still to do" panel, start the bot, press "Start" under its welcome message and answer the questions as a customer.
- Press "Form": type in your products, set the date question's type to "Date", check the payment options and the form name, and press "Save" under the questions.
- On the same page, in "Bot Messages", replace the "Welcome Text" and the "Completion Text" and press the "Save" under "Submission Settings". Rename the pipeline with the "Edit" button and press "Update Pipeline": the site opens your project page, so press the pipeline's name to get back.
- In the "Where people send submissions" block, check that the web form says "On · taking submissions" (if it says "Switched off", press its switch). Press "Open the form" and send yourself a test order. Check the card in Telegram and the "Sent" page.
- Copy the link into your Instagram bio, your WhatsApp Business profile and your Stories, and download the QR code for your packaging.
Other forms for similar jobs: order form for a small business, lead form and service request form. All forms are listed by job in the guide to forms in Telegram.
Taking bookings for a time slot rather than orders? Salons have their own guide: a booking bot for salons. New to bots? How to create a Telegram bot without code explains the basics, although this setup does not need a bot of your own.